
Crypto Payment Plugin for Joomla
This is a ready-to-use plugin for integrating with your website on Joomla CMS and accepting cryptocurrency payments.
PassimPay payment solutions allow you to quickly and easily integrate cryptocurrencies into your business and receive payments in all popular coins.
How does it work?

Create a business account in PassimPay

Add your project to your account

Download the Joomla payment plugin

Integrate it using the instructions

Receive payments in cryptocurrency
When you set up the plugin, payments route through PassimPay, with funds instantly appearing in your account. Users select items, pay via a checkout page, and confirm the payment.
Detailed statistics, charts, and filters help track payments by project, date, and currency, accessible in your account for easy withdrawal.
Information about the Joomla payment module
PassimPay has a ready-to-use module for payment system integration with the website on Joomla. This module allows you to set up and receive payments in BTC, ETH, USDT, LTC, DOGE, USDC, and many other cryptocurrencies. The plugin includes a detailed manual on how to connect and adjust payments.
Joomla is an open content management system with a simple interface that allows users to create different websites: from small one-page sites to large projects with complex structures and large databases.
How to integrate the Passimpay payment plugin for Joomla (JoomShopping)
01 Register on the PassimPay website at https://account.passimpay.io/register
02 Create a new project in your account
In the Passimpay project settings, use URLs that match your live shop domain.
Successful URL: use your store’s order confirmation or return page. The payment method settings in JoomShopping show a ready-made URL return — you can use that value as the successful return URL in Passimpay (example shape):
https://site.com/index.php?option=com_jshopping&controller=checkout&task=step7&act=return&js_paymentclass=pm_passimpay
Fail URL: https://site.com/index.php?option=com_jshopping&controller=cart (example: cart or checkout page on your site; adjust for your Joomla SEF URLs)
Notification URL: copy the exact URL notifications from JoomShopping payment settings after installation (example shape):
https://site.com/index.php?option=com_jshopping&controller=checkout&task=step7&act=notify&js_paymentclass=pm_passimpay&no_lang=1
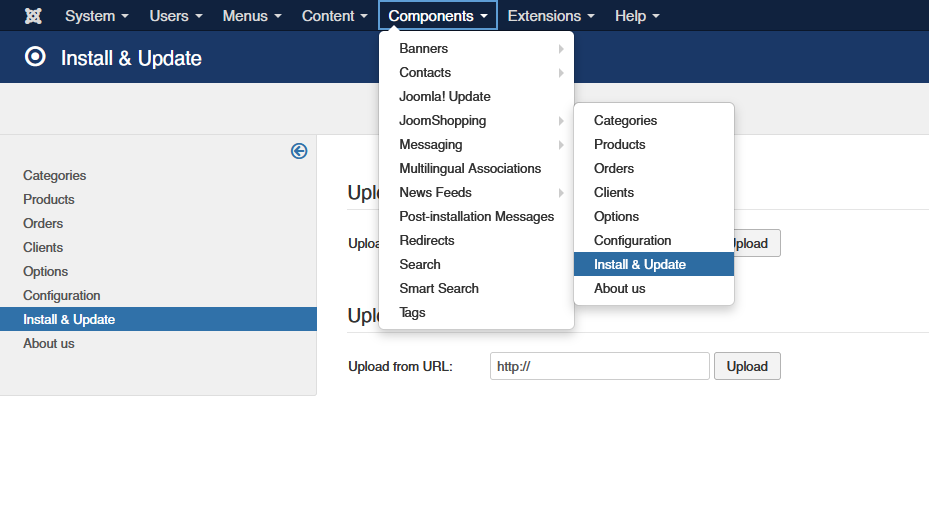
03 Install the payment method via the JoomShopping installer
Install the Passimpay package in Joomla (Extensions → Install). The installer is intended for JoomShopping 5.x on Joomla 5 (or compatible versions per the package readme).
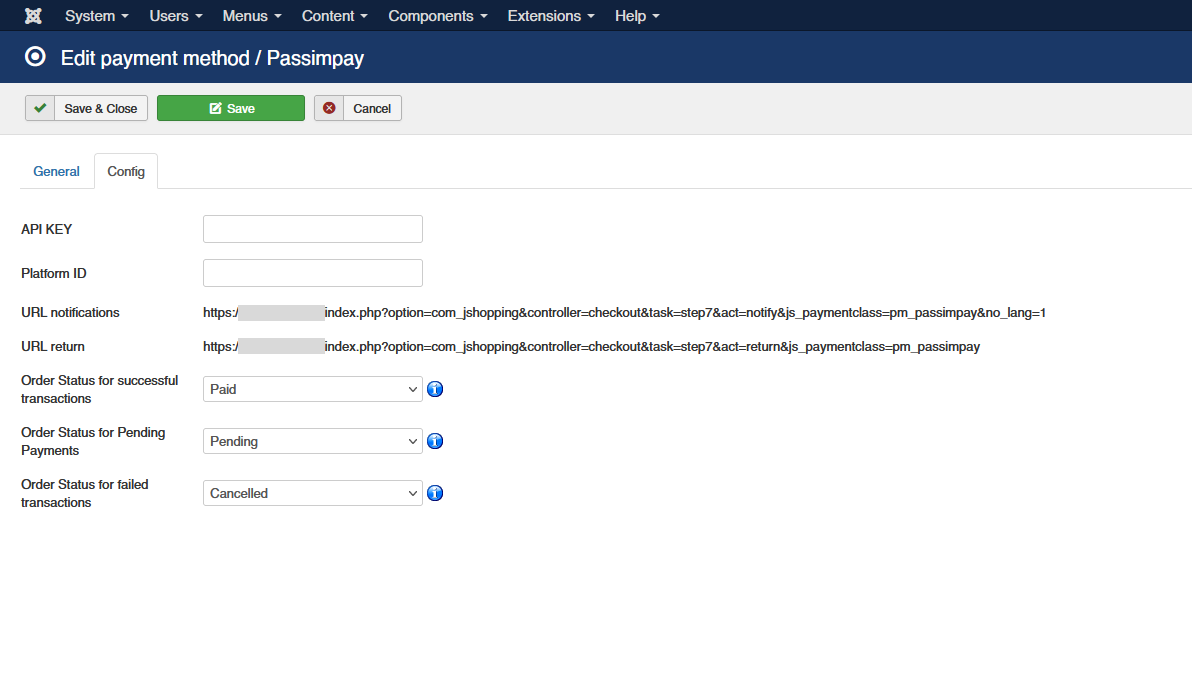
04 In the JoomShopping admin panel, open Options → Payment methods, activate Passimpay, and configure it
- Enter API KEY and Platform ID from your Passimpay account (platform / module).
- Set Payment options (card and cryptocurrency, cryptocurrency only, or bank card only) so it matches your Passimpay platform. For card payments, enable Cards/Bank transfer in Passimpay.
- Copy URL notifications and URL return from this screen into the Passimpay project fields (Notification URL and Successful / return URL as required by Passimpay).
- Map order statuses for successful, pending, and failed payments to your JoomShopping order states.
The plugin is ready to use. Before going live, run a test payment.