
Crypto Payment Bridge for Shopify
Shopify is a commercial e-commerce platform for online stores, retailers, and brands selling physical and digital products worldwide.
Merchants use Shopify to manage catalog, checkout, orders, and payments — including custom and third-party payment options alongside Shopify's built-in gateways.
How does it work?

Create a business account in PassimPay

Add your project to your account

Install the Shopify payment bridge

Integrate it using the instructions

Receive payments in cryptocurrency
When you set up the plugin, payments route through PassimPay, with funds instantly appearing in your account. Users select items, pay via a checkout page, and confirm the payment.
Detailed statistics, charts, and filters help track payments by project, date, and currency, accessible in your account for easy withdrawal.
Information about the Shopify
Shopify is a commercial e-commerce platform for online stores, retailers, and brands selling physical and digital products worldwide.
The PassimPay payment bridge for this platform is a perfect payment processing solution for your business. It is easy-to-integrate and offers numerous features to users.
How to integrate PassimPay with Shopify
PassimPay connects to Shopify via the PassimPay Bridge app and a manual payment method. After checkout, the customer receives an email with a link to pay on the PassimPay payment page (card and/or cryptocurrency, depending on your PassimPay project settings).
01 Register on the PassimPay website https://account.passimpay.io/register
02 Create a new project in your PassimPay account
In your PassimPay project, set the Notification URL (same for all Shopify stores using PassimPay Bridge):
Notification URL: https://bridge.passimpay.io/webhooks/passimpay
Do not use your store domain for this URL — it always points to PassimPay Bridge.
03 Install PassimPay Bridge on your Shopify store
Open the install link below, replacing {shop} with your store's myshopify.com domain (from Shopify Admin → Settings → Domains, e.g. my-store-abc123.myshopify.com).
Install URL: https://bridge.passimpay.io/install?shop={shop}
Example: https://bridge.passimpay.io/install?shop=my-store-abc123.myshopify.com
Approve the app permissions in Shopify. When installation finishes, you will see a confirmation page with a link to configure PassimPay keys.
Important: save your Shop API Token for Step 4
Important: your store must be allowed to install this app. If install fails, contact PassimPay support with your exact *.myshopify.com domain.
04 Configure PassimPay keys in PassimPay Bridge
Open the Bridge settings page (replace {shop} with your store domain):
Settings URL: https://bridge.passimpay.io/admin/settings?shop={shop}
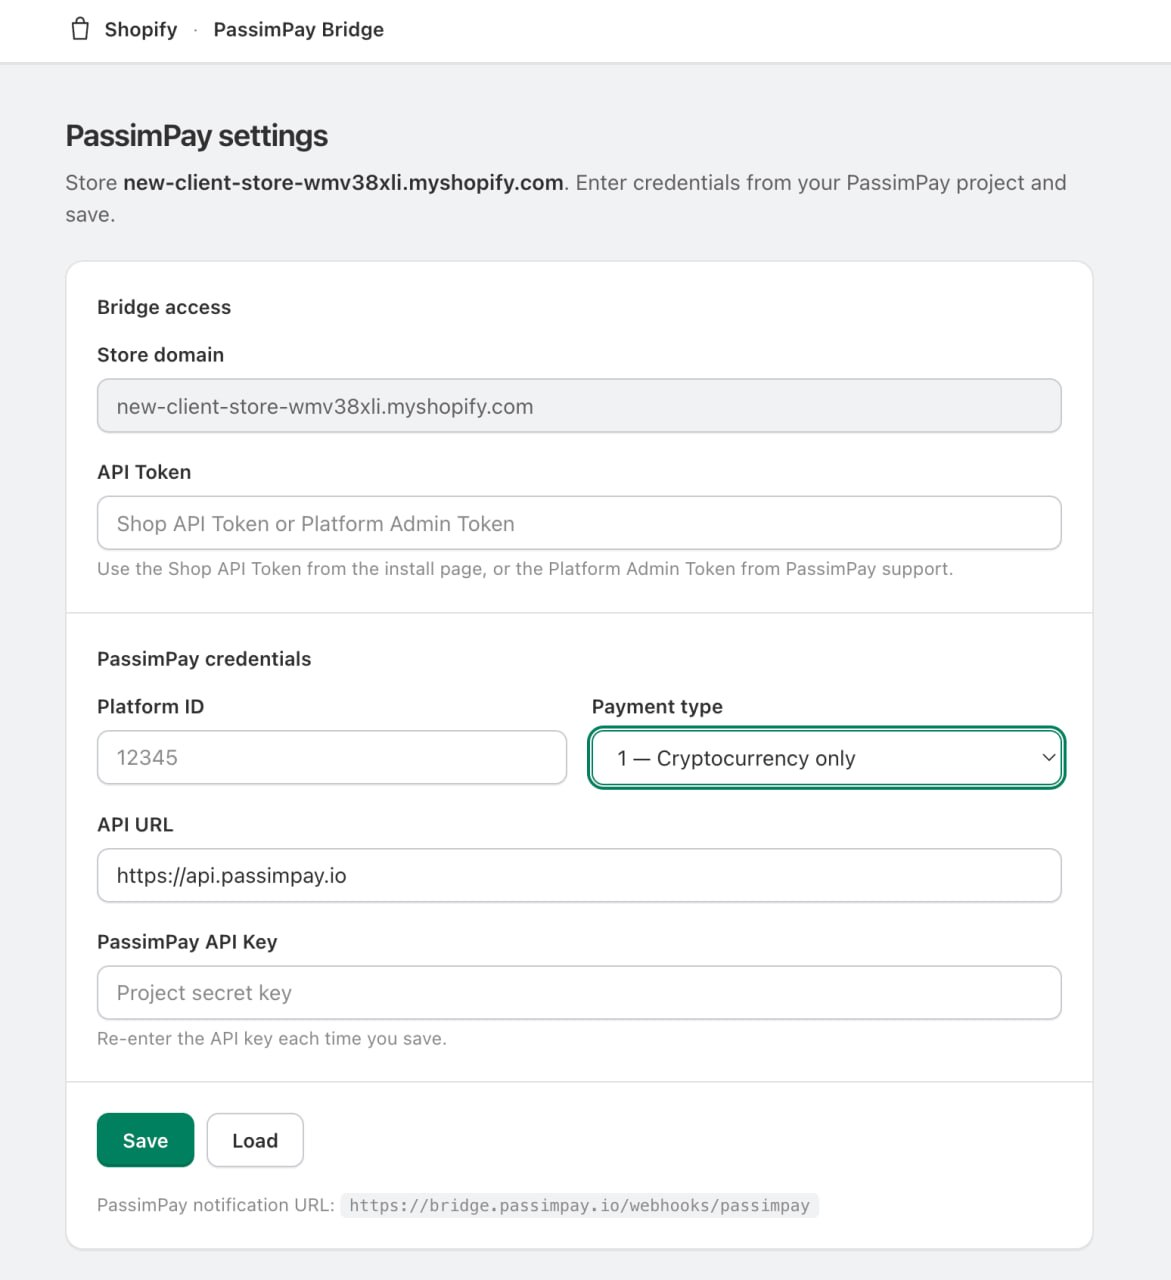
Enter the credentials from your PassimPay platform:
API Token: Shop API Token from the install success page.
Platform ID: From your PassimPay platform.
PassimPay API Key: From your PassimPay platform (enter again on each save).
Payment Type: Must match your PassimPay platform: 0 Card + Crypto, 1 Crypto only, 2 Card only.
API URL: https://api.passimpay.io
Click Save. You should see a success message.
05 Add a manual payment method in Shopify
In Shopify Admin → Settings → Payments, add a Manual payment method.
Suggested name: PassimPay or Pay with crypto via PassimPay (must match what PassimPay Bridge expects — use PassimPay if unsure).
Payment instructions (shown on the thank-you page):
You will receive a separate email from PassimPay with a secure link to complete your payment.
06 Test a payment
Place a test order on your store and select the PassimPay manual payment method at checkout.
- Check your email for Complete payment for order #... from PassimPay.
- Click Pay with crypto and complete payment on the PassimPay page.
- In Shopify Admin → Orders, the order should become Paid.
- In order details, Additional details should include PassimPay invoice with the payment link.
The integration is ready to use. Before going live, we recommend conducting a test payment with a small amount.
Attention: The PassimPay email is sent a few seconds after the order is created, when the invoice is ready.