Opencart Payment Plugin
This is a ready-to-use plugin for integrating with your website on Opencart CMS and accepting cryptocurrency payments.
The CMS Opencart is mainly used to create online shops and e-commerce projects.
How does it work?

Create a business account in PassimPay

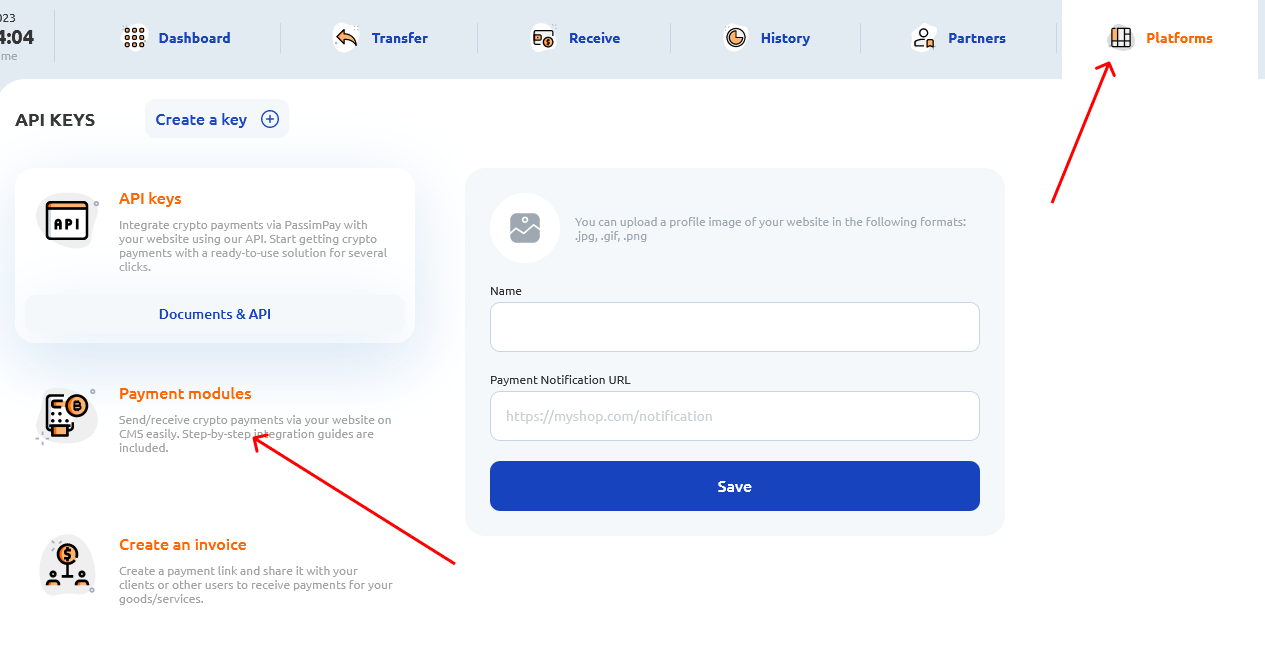
Add your project to your account

Download the Opencart payment plugin

Integrate it using the instructions

Receive payments in cryptocurrency
When you set up the plugin, payments route through PassimPay, with funds instantly appearing in your account. Users select items, pay via a checkout page, and confirm the payment.
Detailed statistics, charts, and filters help track payments by project, date, and currency, accessible in your account for easy withdrawal.
Information about the Opencart payment plugin
The PassimPay team develops ready-made software solutions to make cryptocurrency payments available to any business. We have created a ready-made payment module for Opencart 3 websites so that you can easily and quickly start accepting cryptocurrency for your goods/services.
The module supports over 50 popular cryptocurrencies and altcoins, allows you to customize the payment page to match your website style, and is easy to integrate and configure.
How to integrate plugin for Opencart
01 Register on the PassimPay website https://account.passimpay.io/register
02 Create a new project in your account

Successful URL: https://site.com/index.php?route=extension/payment/passimpay/success
Fail URL: https://site.com/index.php?route=extension/payment/passimpay/fail
Notification URL: https://site.com/index.php?route=extension/payment/passimpay/notify
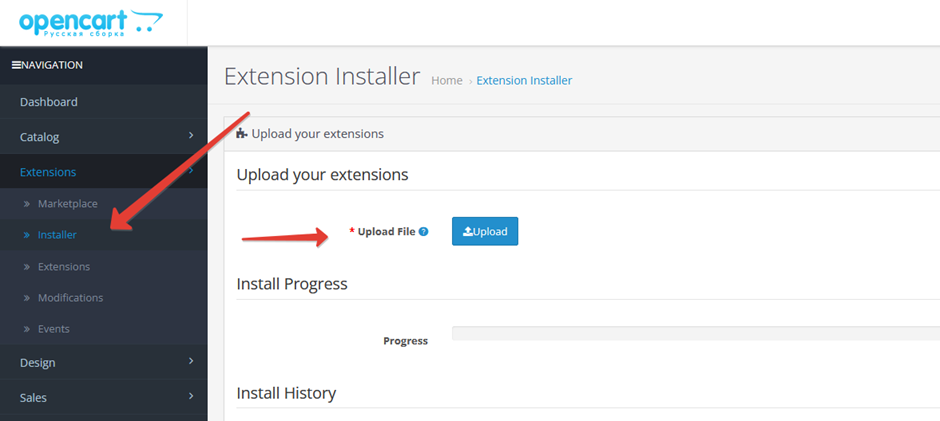
03 Install the module using the installer or unpack the module archive and copy the contents of the admin and catalog folders to the root of the Opencart installation (when pasting, files need to be merged)

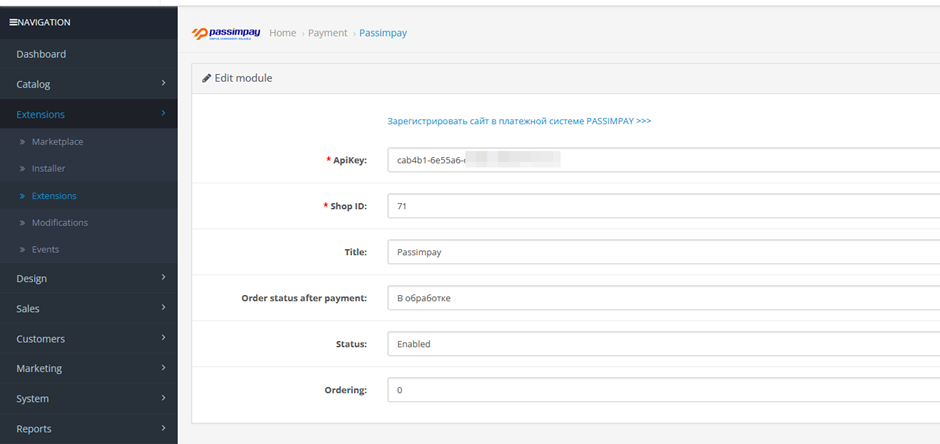
04 In the Opencart admin panel, in the "Modules/Extensions - Payment" section, activate and configure the "PassimPay" payment method.

ApiKey: To get the ApiKey, go to the "Project Settings" section in the passimpay.io personal account
ShopID: To get the PlatformID, go to the "Project Settings" section in the passimpay.io personal account
Title: Payment method name (you can specify "Passimpay (BTC/LTC/ETH/USDT)")
Order status after payment: Displays the order status after successful payment
Status: Enables and disables the payment method
Sort order: Determines the order in which the payment method is displayed (you can specify "1")
The plugin is ready to use! Before launching the plugin, we recommend conducting a test payment.
